How to frame a hipped roof
How to measure, set out and build hip rafter lengths and roofs
Hipped roof construction can seem quite complicated to grasp at first but i'm going to break it down and explain each area in detail.
I'll start at the beginning with the easy bits before tackling the more complicated stuff and that way hopefully I'll make it really clear and easy to understand exactly how to set out, measure, cut and install hip and valley roof rafters. If you know how, it's possible to cut all or most of the roof members safely on the deck before taking them up and installing them all together.
Breaking it down so it is understandable
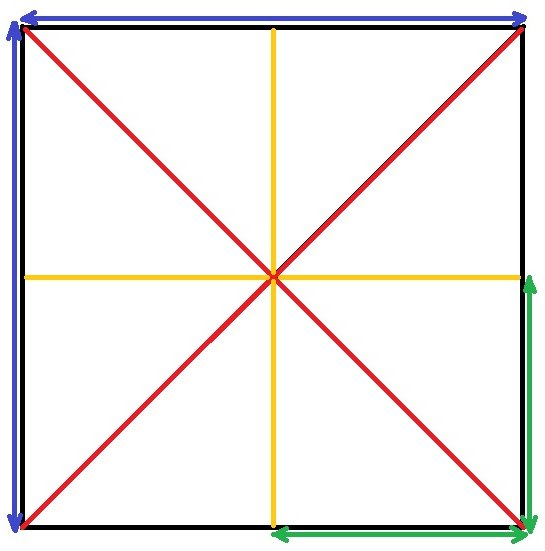
I'll show more detailed pictures of each section as we go, but above is a basic picture of a hip rafter roof from above.
Hip rafters are the diagonal rafters that span from the ridge at the top down to the corners of the roof. If the wall plates are all square/of equal lengths then the hipped rafters would form a pyramid shape like the picture above (normally a roof is rectangle and there are more yellow common rafters).
The hips are in red, common rafters yellow and for hips to work on a square roof like above each member is equal.
The green arrows above show every side is equal, we'll assume 2 metres for this example. Every common rafter is the same length (brown) and each hip rafter is the same length too (red).
Also, the measurement shown above in green from the corner of the roof to the center of each common rafter is equal for each as well - 1 metre.
Hipped roof close-up
You'll know from the page about calculating common rafter lengths that we subtract the thickness of the ridge from the span so that the ridge will fit in between them. That means each pair of common rafters is too short by half the thickness of the ridge.
So to use the same method for common rafters on each side of this hipped roof, the center of the above roof would need a square block in between all the rafters for the common rafters to be fixed to. Otherwise they would be too short. Let's assume the ridge and all roof members are 50mm thick, so 50mm would be removed from the length of the span before calculating the common rafter lengths. Because of this we put a 50mm square block in between the common rafters when building the hipped roof above.
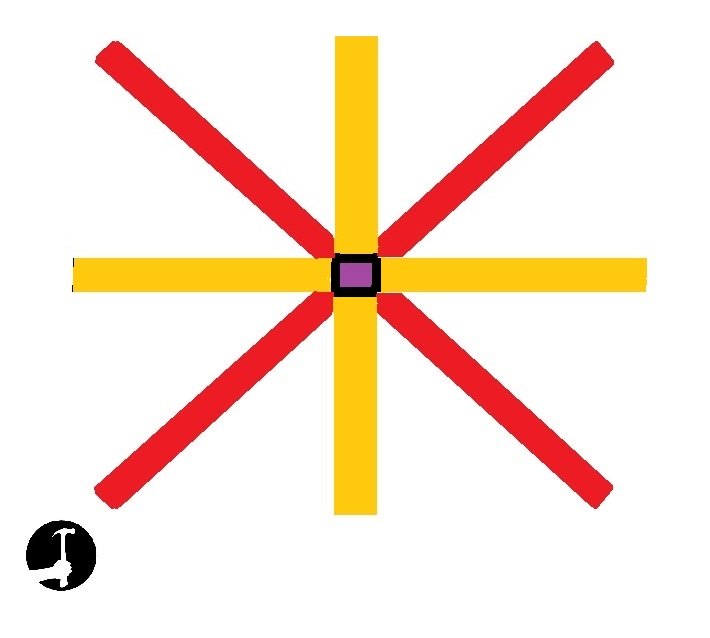
A close up of the top of the above roof and how each rafter and hip would fit together with the ridge (shown in purple) would look like this (notice the red hip rafters are cut to a point);
Adding and calculating the ridge length
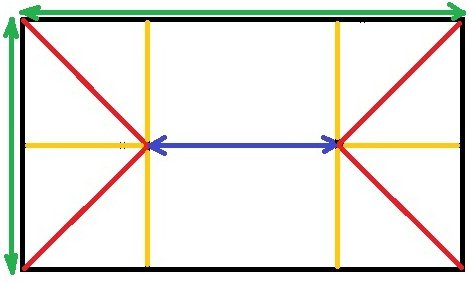
Hipped roofs are rarely square like the example above. The picture below shows the same roof, extended length ways with the addition of a ridge. It is basically a gable roof with half of the hipped roof above stuck on each end.
For that reason, we can use the same common rafters all the way around it. We'll assume the new length of the roof below is 3.4 metres.
To calculate the length of a ridge in a hipped roof you simply subtract the width away from the length. Importantly though, you must add the thickness of the ridge back on to that measurement, so we can use the same common rafters already measured (we've removed the 50mm purple ridge from above, so need to now add 50mm on to the new longer ridge).
How to calculate the length of the above ridge:
Length - Width + Ridge thickness
3400 - 2000 + 50 = 1350mm
The ridge in this example would be 1.35 metres long.
Hip rafter plumb cut
The hip rafter plumb cut is a different angle to a common rafter plumb cut. If you are using a Stanley Quick Square, move the blade to the corresponding notch for the hip rafter.
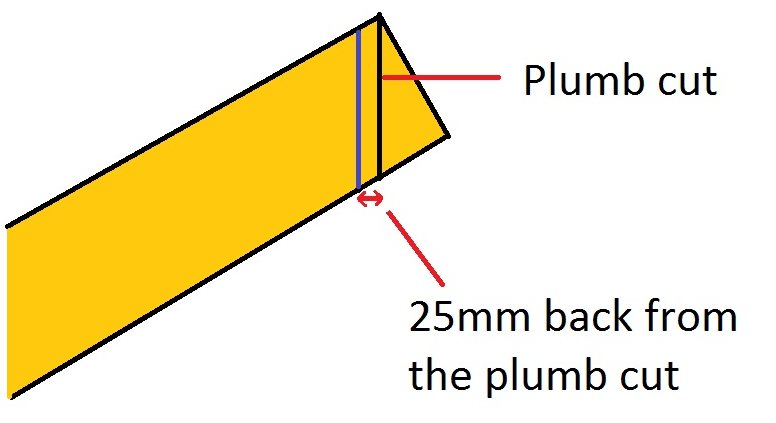
Also it has to be cut to form a point, so to cut a hip raffter plumb cut you need to set the circular saw over so it will cut 45°. Then, mark a plumb line on the end of the timber (check to make sure the bow/camber is upward). Because we want a point on the hip though, we need to mark back square from that plumb line half the thickness of the ridge, in this case 25mm.
Put a new plumb line there and cut with the circular saw. The point will be where the original plumb cut was.
Cutting the hipped rafter Birds-Mouth section
Here you want to set the birds-mouth out so the top edge of the hip will be the same vertical height up off the wall plate as the common rafters are.
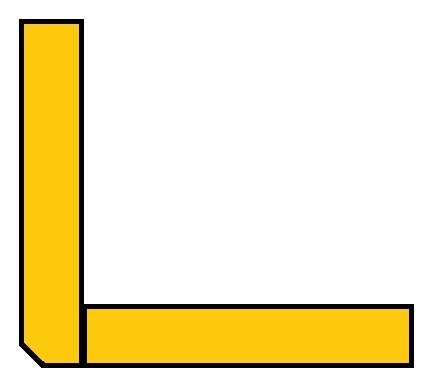
Something we need to allow for is when the hip birds-mouth is offered up the point of the wall plate corner will touch the birds-mouth, but there will be a small gap either side.
You can mark the width of the hip rafter onto the wall plates and cut the corner off like in the picture above so the plumb cut butts up tight. This affects the length the hip rafter spans though and you might need to chop the brickwork off below to match, which adds more work.
Instead I leave the corner on and just make sure to compensate for the gap when marking the birds-mouth. The picture below shows the length of the hip in blue, where the birds-mouth plumb cut is and where the gap will be because of the wall plate point. The gap will always be 1/2 the thickness of the ridge material.
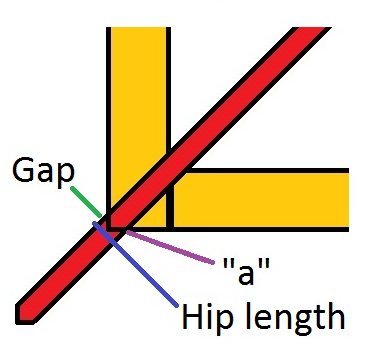
Mark the length of the hip measuring down from the longest point of the plumb cut. Then, mark another plumb cut 25mm over, which denotes where the hip would touch the wall plate if it wasn't for the gap.
Then measure down that plumb cut the same distance as the common rafter's 'height above plate'. That is where the seat cut should be made.
Click here to go back to the main Roofing page
Or click here for help installing the fascia & soffit boards
Use the comments section below to add your own tips about cutting hipped roof rafters