Fitting Roofing Wall Plates / Top Plates
Setting out, squaring, levelling and fixing/strapping gable and hip roof wall plates for rafters, joists and roof trusses
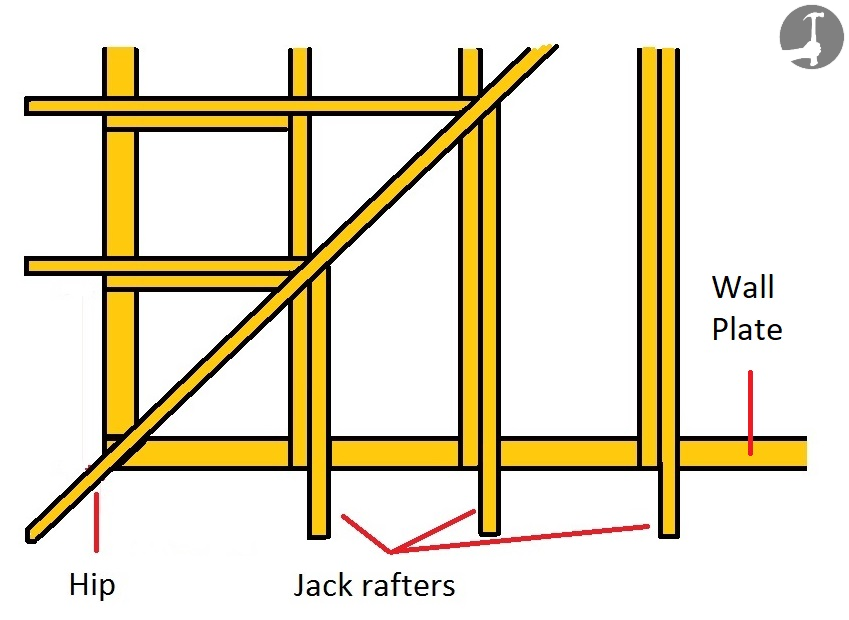
Getting the wall plates or top plates as they are sometimes called right is important because all the ceiling joists, roof rafters hips etc. will all be fixed to them.
In order for all the roof components to work, they must be square, parallel, level and fixed down properly.
They are cut to the same length as the brickwork they sit on, a half lap joint is great for the corners to be fixed to one another.
Squaring and fixing the wall plates to the brickwork
First work your way along the brickwork and clear any 'snots' off (lumps of much the bricklayer has left). Ensure the top of the brickwork is as flat as possible and the wall plates can sit down tight onto it.
For square or rectangle buildings, cutting opposing plates the same length will help keep things square.
Measure across from wall to wall to make sure the brickwork is parallel. If you don't have a long enough tape measure, use a long length of timber up flush at one end and mark the other, then use like a rod for the opposite end.
If there is a variance, there will be a limit to how much you can adjust but you may need to pull one side in and the other out to try and even/square things up.
When fixing the wall plates down onto the brickwork, if the building is square/rectangle measure from corner to corner diagonally. When the measurement is equal the plates are square.
|
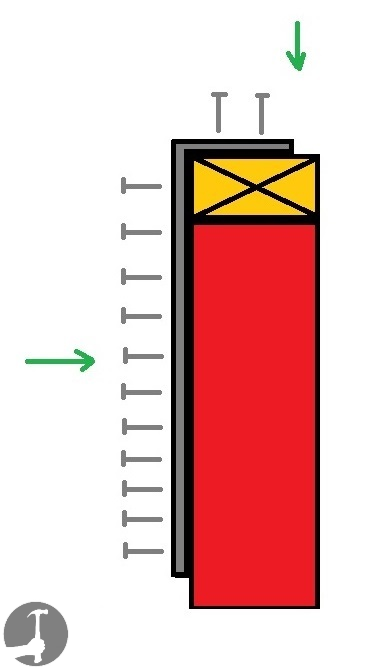
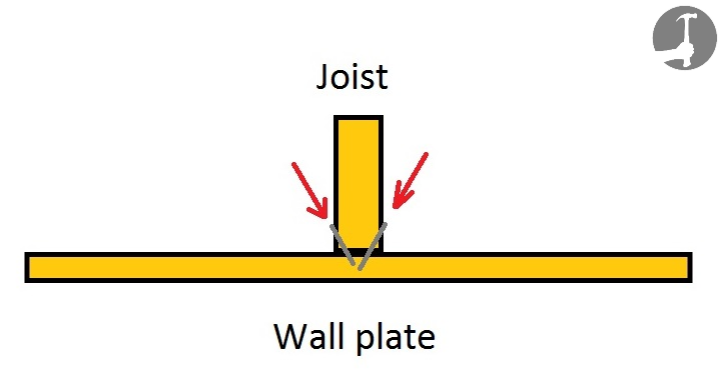
Another way when the roof is too large for that or there are not four corners is to use the 3-4-5 method shown here to make sure the corners are at a perfect 90 degrees. They should be fixed firmly to the brick or blockwork underneath. In the UK they're bedded on sand and cement to lose any discrepancies in the brickwork then fixed down securely with lateral restraint straps, though you might want to wait until you've set out the joists first so you don't put the straps in the way of the joists or rafters. To fix the joists and rafters down on to the wall plates they should be 'toe' or 'skew' nailed to the top plate like below. |
 |
Set out the ceiling joists onto the wall plates
The ceiling joists are installed before the rafters as they will stop the roof spreading and also give something for you to lay planks across to stand on when building the roof.
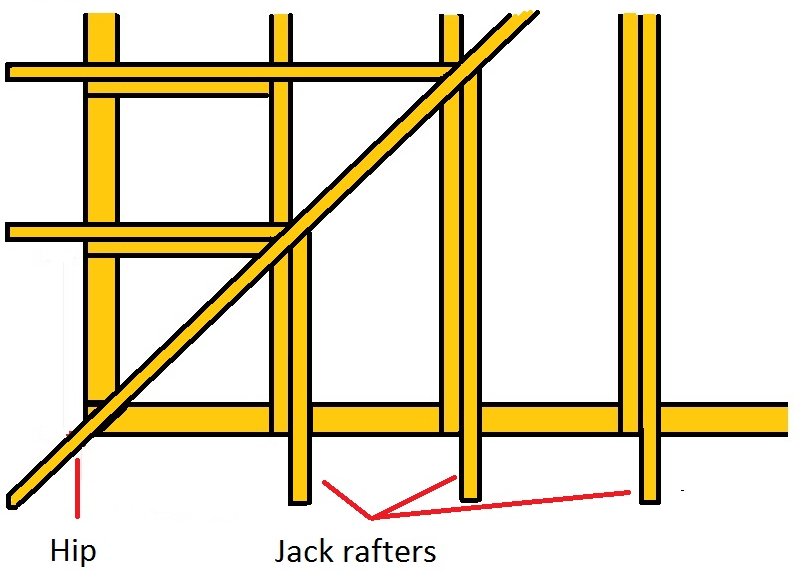
The picture below shows how the ceiling joists are laid out on the wall plates for a hipped roof.
Because there will be rafters on all four sides of the plates you can't run a ceiling joist right up against the wall (to the left of the three pictured below). If you did, it would be in the way of the rafters on that left hand wall. Instead, shorter ceiling joists have to be trimmed across and fixed to the first one. These give you something to fix the plasterboard to from underneath later on.
After the hip and jack rafters are installed more joists or noggins can be fixed in the corner to fix the plasterboard to.
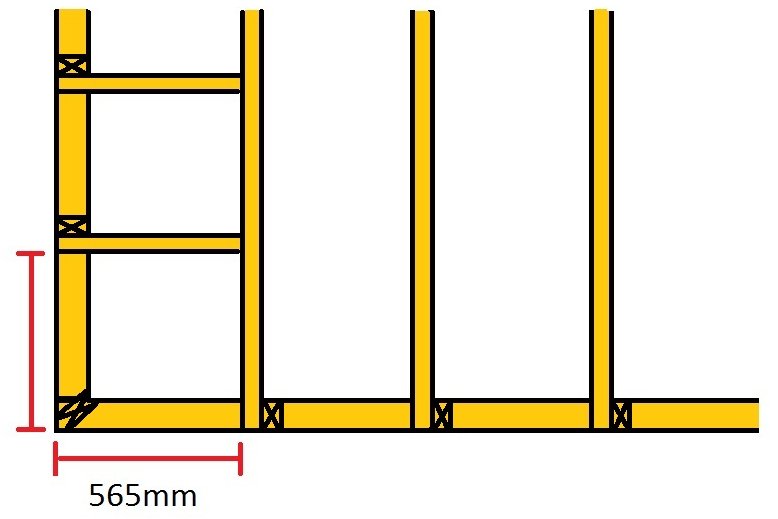
These joists are laid out at 600mm centers so I measured from the outside edge 600mm to the furthest side of the first joist, then 1200 to the next and so on at 600mm centers. The jack rafter will sit tight up against the further side of the joist from the corner, where the 'x' is on the drawing.
Likewise for the trimmed joist, 600mm from the outside of the wall plate. The trimmed joist will measure 600mm minus the thickness of the joist (substitute 600 for 400, 450 or whatever centers you are working to).
If you have tall joists you may need to cut a 'splice' or seat cut on the end of the joist so it doesn't protrude above the rafters.
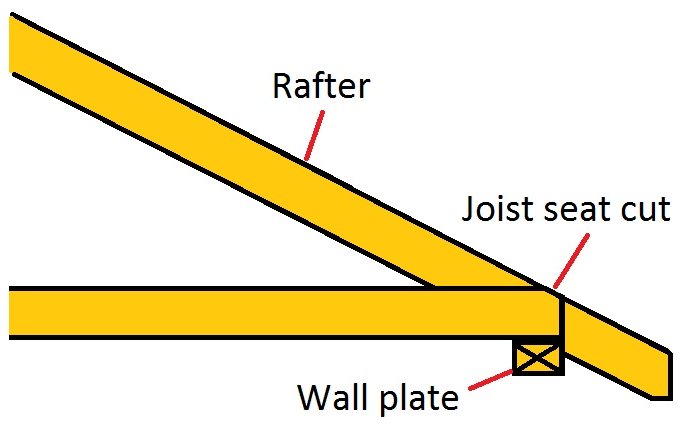
The picture below shows how it will look once the hip and jack rafters are installed.
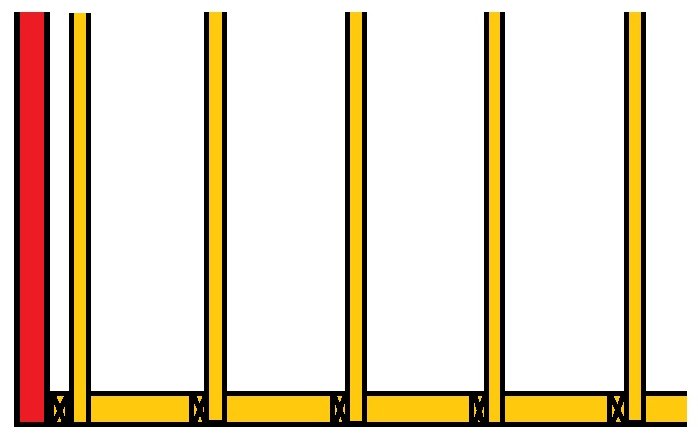
Gable roof plate top layout
When constructing a gable roof the ceiling joists are laid out slightly differently. The picture below shows the ceiling joist starts 50mm away from the brickwork gable wall. This is to let the common rafter fit in-between later. The second joist should still be 600mm to the center and so on so that the plasterboard can be fixed to it (substitute 600 for 400, 450 or whatever centers you are working to if different).
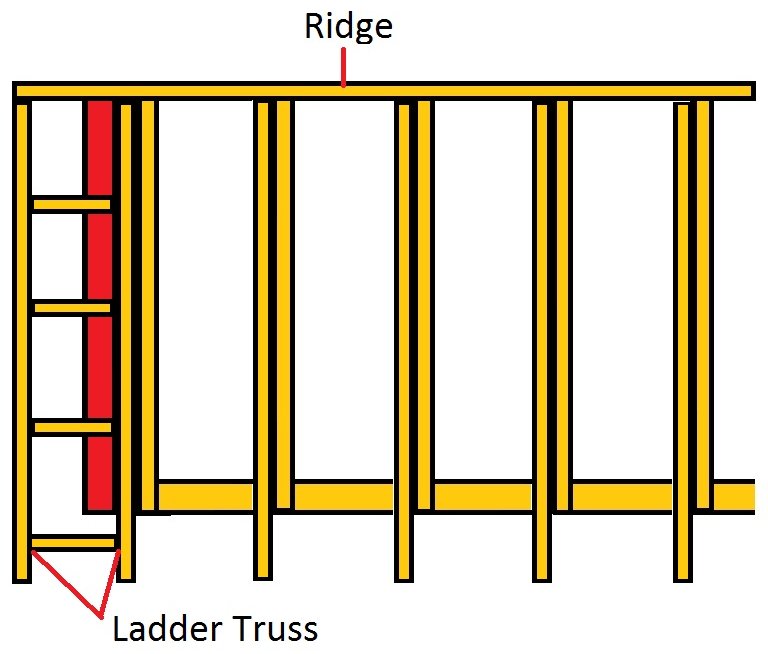
When the rafters are installed the ridge goes past the brickwork and noggins are fitted to fix a common rafter outside the building that will carry the barge board and soffit, below.
What comes next after the wall plates are fitted?
If you know exactly where it needs to go, it might be easier at this stage to trim out the joists to accommodate a loft trap for access into the roof space later on.
After the top wall plates and joists are installed you can start working out the rafter lengths.
Or click here to go back to the main roofing page?
Use the comments section below to add your own tips for cutting, squaring and fixing wall plates down;