Fitting Skirting Boards perfectly to walls - follow this step by step guide on how I cut, fit, scribe and fix baseboards
This section contains everything you need to know about fitting skirting boards to a high professional standard, even if you are a DIY novice attempting to install skirting to walls for the first time.
Some of the different aspects that are covered on these pages;
- Common skirting board molding types available
- A complete list of the tools and fixings you need to cut, fit and fix skirting boards
- How to cut perfect internal corners
- How to cut perfect external skirting mitre joints
- How I fix skirting boards to the walls (different methods depending on wall and type of boards)
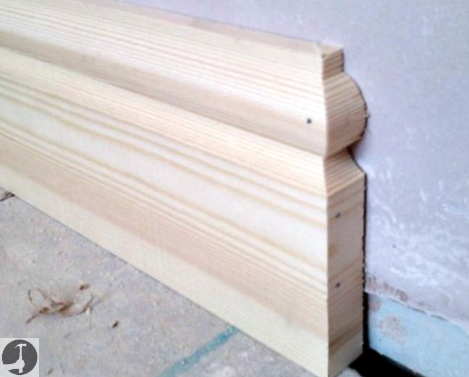
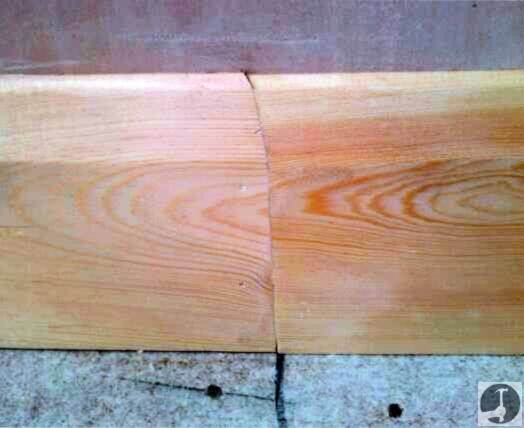
- Some of the different ways I end skirting boards, like the pic above
What are skirting boards & when are they fitted?
Also known as Base Boards (in America) skirting boards are the tall decorative moldings mitred, scribed, butted to the walls, fixed around a rooms perimeter to cover and tidy the join where the wall meets the flooring or carpet.
Carpenters will be fitting skirting boards during the second fix stage, after the doors have been hung and architraves fitted.
They also protect the walls from getting battered by the vacuum cleaner.
The techniques for fitting skirting boards are the same for all profile and mouldings types available.
If the floors will be carpeted, I fit the skirting boards before the carpets are laid (ideally the decorating has been done and the carpet fitters are the last trade in).
If wood or laminate flooring is being laid, I fit the skirting boards last.
Common types of Skirting Board profile available and materials
You can make a Skirting Board profile out of almost anything. You can if you're feeling creative even make your own with a Router and some cutters.
Fitting skirting boards that have grooves cut in the back is usually easier, as these grooves help prevent cupping (curving).
Sometimes skirting boards come double sided as well, with a different profile on each side.
Some of the common types of Skirting Board profiles available off the shelf include;
- Square (can even use PSE timber off the shelf)
- Bullnose
- Chamfered
- Pencil Round
- Ovolo
- Torus
- and Ogee
Skirting boards are available in several different materials too, like
- Softwood (Pine, Douglas Fir for eg)
- Hardwood (Oak, Mahogany, Bamboo for eg)
- and MDF (usually supplied already primed)
The easiest skirting boards to fit and fix are pine. The hardest are probably MDF. MDF is great in that it doesn't bow, twist or split and can come primed already. But the dust is nasty and it can flake/peel in some instances.
When buying skirting boards check for the straightest lengths with least amount of knots and other imperfections.
What tools are needed when fitting skirting boards?
This is a complete list of all the tools I use when fitting skirting boards to get perfect corner joints, miters, scribes, to fix the boards firmly to each other and to the walls:
- Sharp pencil - HB are good for 2nd fix carpentry work
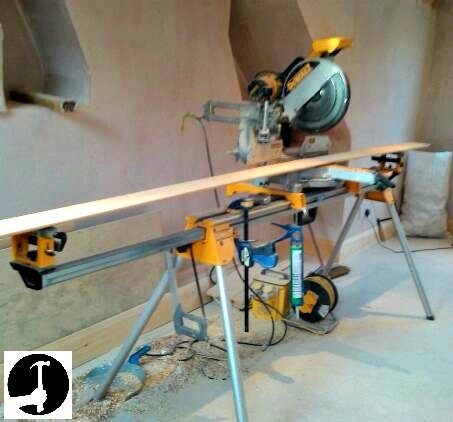
- Mitre/Chop saw - I've got a huge Dewalt chop saw which is really accurate and can shave off small amounts, cutting Skirting boards is possible with a hand powered mitre saw instead
- Tape Measure - I use a 8m Staney pocket tap measure
- Compass - I use a Faithfull 200mm Square Leg Divider/ Compass to scribe internal corners
- Coping Saw - I use a Eclipse coping saw
- Wood Glue - I use Gripfill or no more nails to stick skirting boards to walls, PVA to glue the miters together. There's more info about the most common types of wood glue and their best uses here
- 2nd fix Nail gun - I use a Dewalt 2nd fix nail-gun to pin mitres together and fix MDF skirting boards to the walls (with 'no more nails' glue behind)
- Nails, punches, screws and a battery drill I've written a whole page about how to fix skirting boards here
I've got an extendable stand above but if you don't have one or anything similar you can improvise with things you can generally find on site.
Should you cut Mitres or Scribe Skirting board corners?
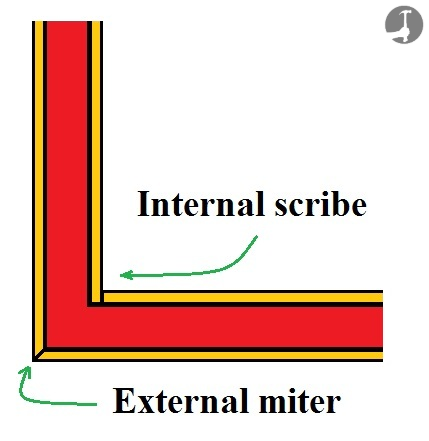
When joining skirting boards at an outside corner they will always be mitred. The most common type is a 90° degree corner so two 45° degree cuts are needed.
At an inside skirting corner one board is cut in tight/square to the wall and the second is then cut and 'scribed' to the exact profile / shape of the first board. This is called an internal scribe.
There should only ever be an internal miter if the angle is very shallow, less than 22.5°, like in a bay window for example, when scribing is very difficult or near impossible to do.
When planning where to start in a room try to avoid having a scribe on one end and a miter on the other if possible.
When fitting skirting boards, if a single skirting board length isn't enough to cover a wall in one piece, you will need to cut a Lengthening Joint.
I never Butt join two boards together end to end square, I always join them together with a mitre, between 30-45°.
This helps to hold the two pieces flush, gives the joint a large surface area to glue together and they can also be fixed (pinned) to one another. If you cut them square, they are very difficult to line up and keep flush.
If you are fitting skirting boards to stud work timber walls, make sure you position the lengthening join where there is a timber stud behind that you can fix the end of the overhanging board to. It will look a bit like the below right picture, the marker pen on the floor is there so I know the position of the timber studs.
Taller skirting/base boards can be prone to ‘cupping’ and like the more decorative moldings may need a little extra attention, I’ll show you how to get a perfect fit on those too.
 |
 |
Step by step guide for cutting, fitting and fixing skirting boards to the walls
- Step 1: Get set up, determine how you will fix the Boards to the wall
If unknown, bang a nail into the wall somewhere it will later be covered by the skirting to find out what the wall is made of (make sure you don't do this above/below an electric socket or anywhere else there may be a cable!)
If you are fitting skirting boards to timber stud work walls then before you start anything else locate and mark clearly all of the studs (when building stud work you can save yourself time at this stage by marking the position of the studs onto the floor).
There should be one timber stud in every corner and then at equal distances of either 400mm or 450mm (rarely up to 600mm) apart.
Bang a nail or Brad Awl into the wall, again below the height of the Skirting so the hole won’t be seen later. Once you’ve found two or three, you can measure the distance apart they are to help find the rest.
Use a stud/pipe/electrical cable detector whenever possible to locate pipes and cables first.
Mark all of the Studs onto the floor so you know where to nail/screw later (you can put a faint pencil line on the wall if necessary).
- Step 2: Cutting the first skirting board - find the best place to start off
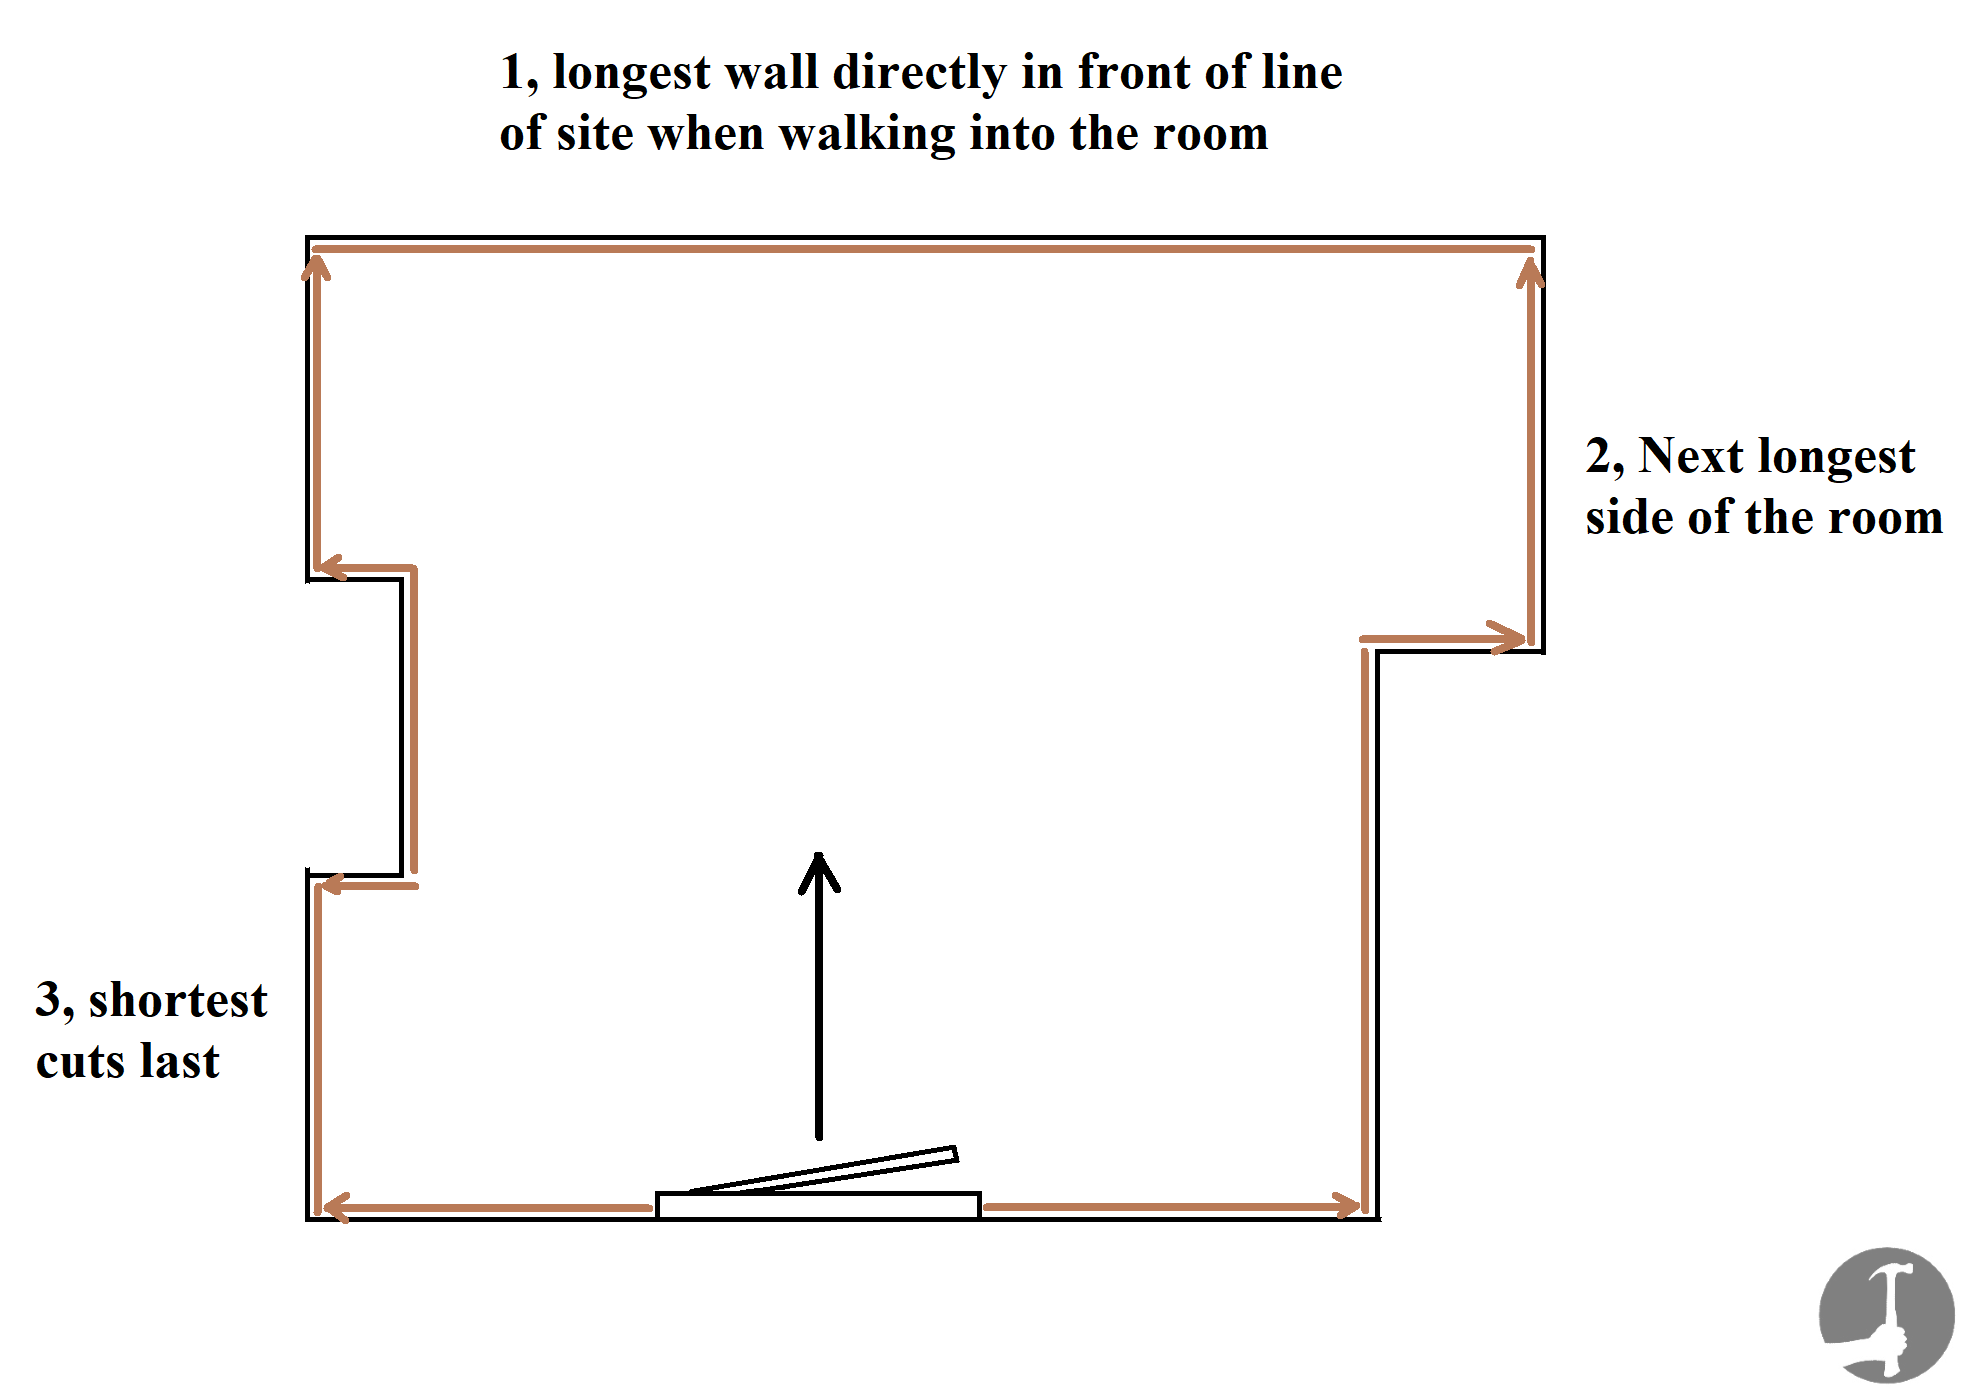
The picture above explains how I decide which skirting boards to cut first. The arrows indicate an internal scribe joint.
The back wall is the longest and the first seen when walking through the door, so I cut that skirting board first, tight up against the two walls either side.
Second, I move round the right hand side as the lengths of skirting there are longer than those on the left.
Whenever possible, my scribe cuts are positioned so they are less likely to be seen and always avoid having a scribe on both ends of a board.
The picture below shows when fitting skirting boards in between two walls, the top edge is long and the bottom edge slightly shorter, which helps fit the top of the boards really tight;
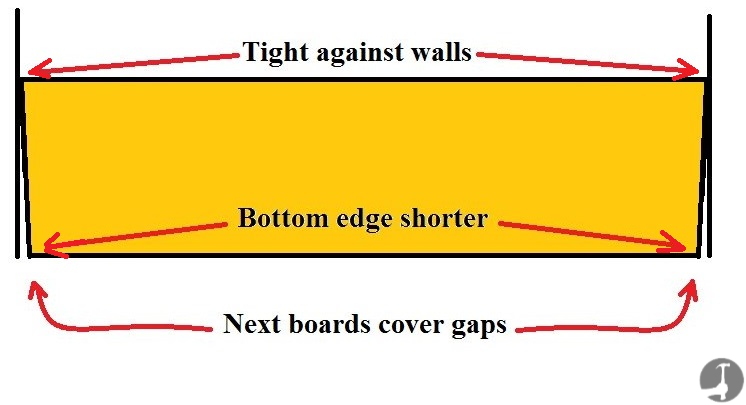
This isn’t always necessary but cutting it out of square every time saves you going back to the saw on occasions when the plasterers have been lazy!
This first boards needs to be fixed properly now, so nail or screw it tight to the wall depending on what is recommended on this page.
- Step 3: How to cut perfect 45° & 90° degree mitres for external skirting board corners
 |
 |
After fitting skirting board in between two walls like above, the next one will need to be scribed into it.
Click here to see how I scribe perfect internal corners using a compass and coping saw.
90° Outside corners get mitred at 45°. The mitre is cut last, so I fit the opposite end first (that could be butting into a wall or scribed into another piece). Only once that's perfect can the miter be marked.
To do that, I hold it in place like in the picture top left and mark a line up the back of it where the wall stops.
Next, place the board onto the chop saw bed face down so you can see the pencil line. Tilt the mitre saw over to 45° degrees (check with a square) and slowly cut the Skirting miter, keeping the saw blade to the 'waste side' and leaving the pencil line in.
Repeat the process for the opposing miter, put them in place and push the two together to make sure they fit, trim a bit more off if they are too long.
Click here if your corners are not perfect 90° and you need to bisect and divide the angle
- Step 4: Fixing Skirting Boards
I always glue and pin the mitre joint together with veneer or panel pins and plenty of wood glue before fixing the two pieces to the wall.
Once that's fixed together neatly I screw/nail the Boards to the wall. Punch the nails under the surface and sand off any remaining pencil lines.
Other methods I use to Finish Skirting Boards
Often when fitting skirting boards you'll come across situations other than straight forward Butts, Scribes and Mitres and need to end or continue the skirting boards differently.
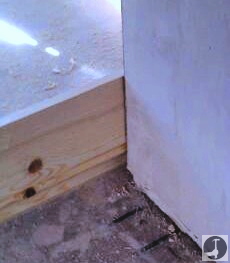
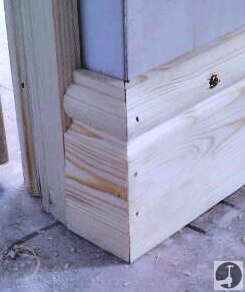
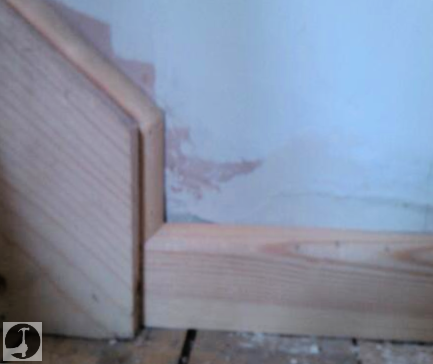
In the picture below left I was fitting 75mm Bullnose skirting board and ran into a staircase stringer. I used a Quadrant molding to continue the profile up the stairs seamlessly and it doubled up as covering the gap between the staircase and the wall as well.
 |
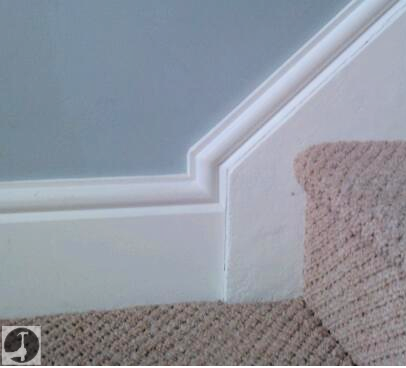 |
The picture above right shows how I did the same thing when fitting skirting boards at home as well.
Ideally when you install a staircase you should cut the string off at the same height where the skirting profile meets the square flat face to make this easier and avoid the step-up..
Click here for a whole page on how to end skirting boards differently - like mitering into the wall.
What's next?
After fitting skirting boards to the walls, other profiles and mouldings like dado rails and picture rails can be fitted as well.
Click here to go back to the main 2nd fix carpentry page
Use the comments box below to give us your own tips for fitting skirting boards;
