How to install a Flush Bolt to double rebated doors, to hold the slave door shut
|
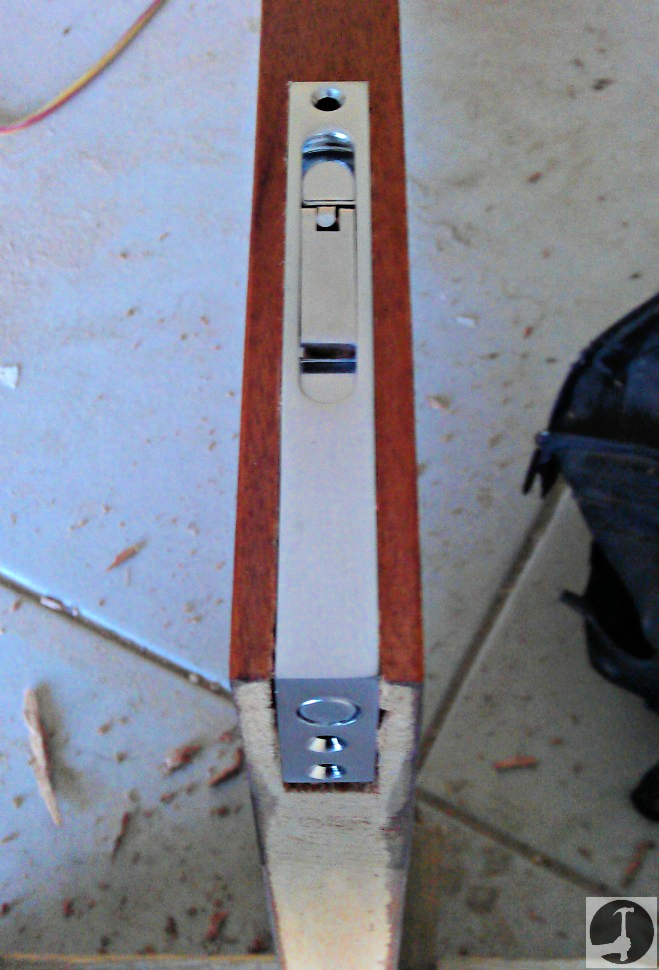
The door flush bolt is a flush mounted dead bolt lock that performs a similar job to a barrel bolt of holding a slave door (secondary door of a rebated pair for eg.) closed. Most commonly when there are a pair of doors for example it is used to hold the slave door (door that opens second) fixed closed. The master door can then still be opened with the handle, but the slave door must be unbolted first to open the pair out fully. The door in the pictures isn't rebated but the same methods apply. When the doors are rebated, the flush bolt can be installed on to the face of the door rather than the edge. Sometimes only one is installed at the top but having a dead bolt at the bottom as well as the top is recommended. The slave door should then be held firmly closed when not in use because that way it won't rattle around and the master door will have something firm and rigid to close against. |
 |
How to install a flush bolt neatly, step by step
Once the doors are hung perfectly and the slave door is identified you can mark the position of the door bolt at the top of the doors edge.
Find the center of the doors edge and place the bolt there, flush with the top of the door.
I always use a marking gauge to scribe the width of the bolt onto the door because the result is perfectly parallel and square marks to chop out to.
You can practice on the top or bottom of the door where nobody will see to get the gauge set up perfectly before marking the edge of the door that will be visible. Once scribed, use a sharp Stanley knife to carefully take those cuts deeper.
Remove the door from the lining and place it in your saddle and block or something similar to hold it firmly in place while you work.
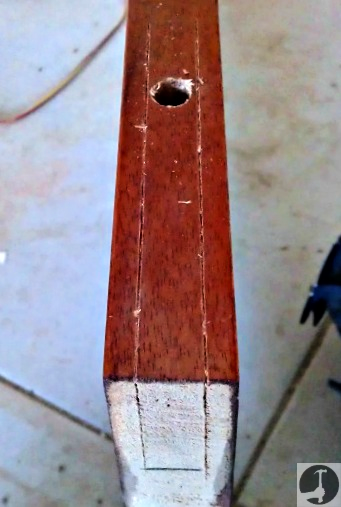
If you have a light weight router and a straight cutter you could set that to the thickness of the face plate (usually about 3-4mm), and use it to remove that material first. In this instance though all I used were a marking gauge, auger drill bits (spade bits would be fine) and some very sharp chisels.
It's really important that you mark with a pencil the positions of the screws and do not mortice too much timber from these two areas or there will be nothing to screw the bolt to!
Once established, turn the lever like in the picture below so the pivoting bar inside is out at it's furthest point (not necessary if the button slide up and down instead of having a lever like in this example). This will give you the depth that you will need to drill/mortice the deepest part into the doors edge.
Importantly you can see the pivoting rod inside the bolt is at an angle, and more needs to be removed from the deepest part than where the flush bolt will actually be screwed into the top edge of the door. Drill a series of holes to remove most of the timber before chopping out the rest of the shape.
You need to be really careful when chopping out the timber and use extremely sharp chisels. There isn't much "meat" left on the doors edge, and it's really easy at this stage to split or break out the thin amount of timber that's being left on, ruining the door. Always cut across the grain first, then along it.
If you have a light weight router and a straight cutter you could set that to the thickness of the face plate (usually about 3-4mm), and use it to remove that material first. In this instance though all I used were a marking gauge, auger drill bits (spade bits would be fine) and some sharp chisels.
It's really important that you mark with a pencil the positions of the screws and do not mortice too much timber from these two areas or there will be nothing to screw the bolt to!
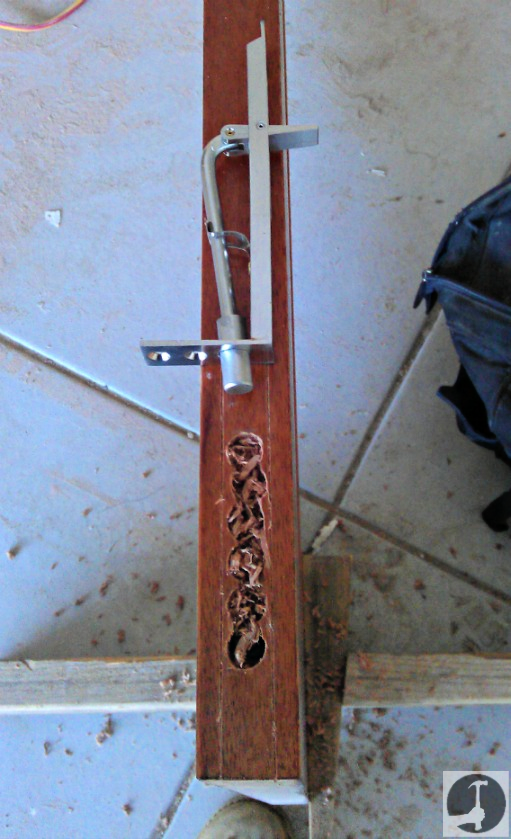
Once established, turn the lever like in the picture below so the pivoting bar inside is out at it's furthest point (not necessary if the button slide up and down instead of having a lever like in this example). This will give you the depth that you will need to drill/mortice the deepest part into the doors edge. Importantly you can see the pivoting rod inside the bolt is at an angle, and more needs to be removed from the deepest part than where the flush bolt will actually be screwed into the top edge of the door.
Drill a series of holes to remove most of the timber before chopping out the rest of the shape. You need to be really careful when chopping out the timber and use extremely sharp chisels. There isn't much "meat" left on the doors edge, and it's really easy at this stage to split or break out the thin amount of timber that's being left on, ruining the door. Always cut across the grain first, then along it.
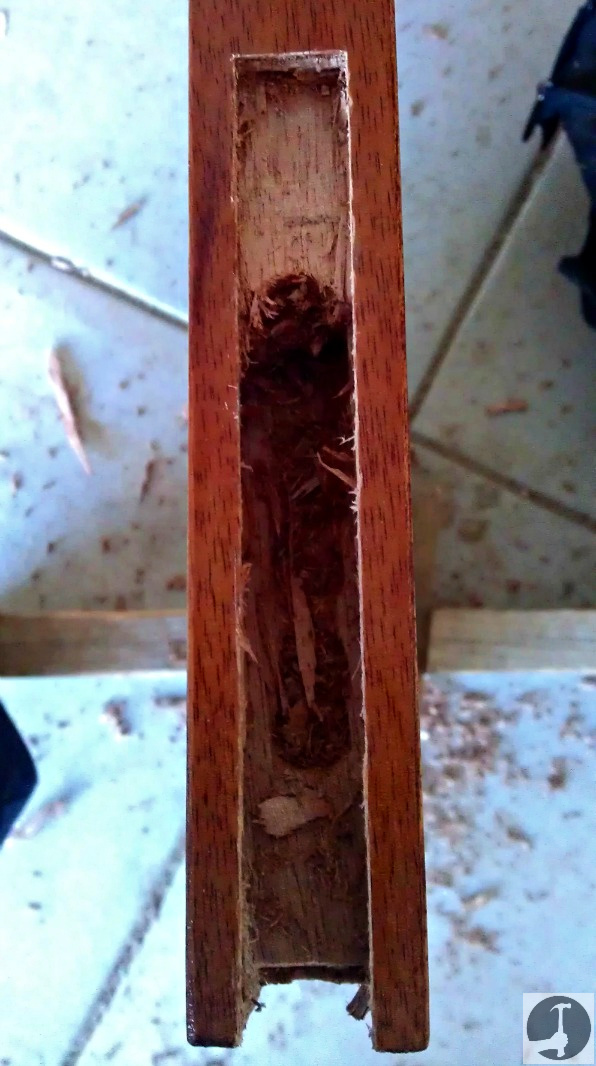
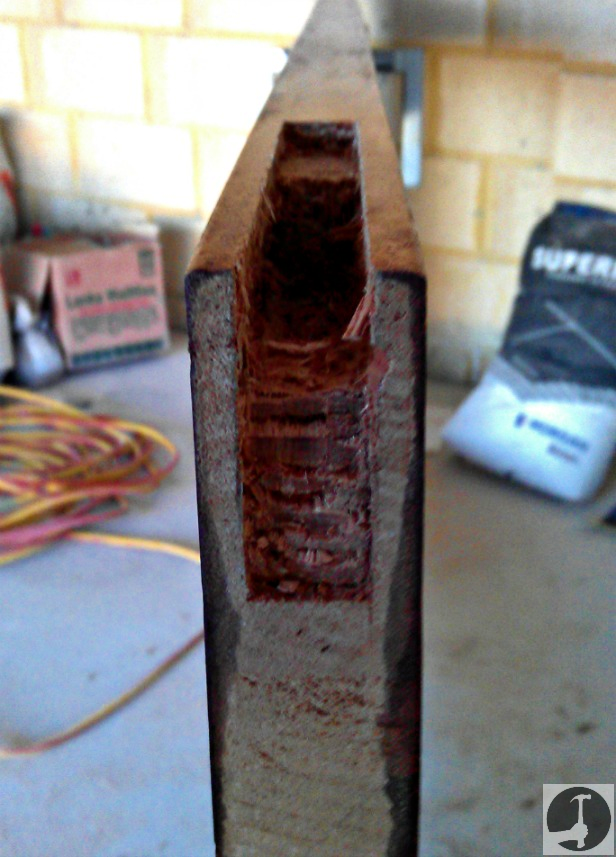
Once chopped out, the door should look like the pictures below. The doors edge has been mortised out, but there's still plenty of timber where it's needed to screw the flush bolt to.
 |
 |
How to fit the flush bolt keep into the frame
Next, slot the flush bolt into the hole and be sure to pilot drill the holes before screwing it up.
Finally, screw the door back on and close it. Flick the lever so the bolt goes up and mark around it on the floor or head of the door lining. If into wood, drill out with an auger or spade drill bit a little larger than the bolt itself (but smaller than the width of the plate) and check the hole is in the right position before chopping in the little face plate. Sometimes you don't need to chop the face-plate in like if you install one at the bottom of the door sometimes drilling the hole is enough depending on the floor type. If it's a concrete or tiled floor then just having a carefully drilled hole there is better.
You can see more info about setting out a keep on the page here about installing a mortice latch.
What's comes next?
If the door isn't closing right click here for help adjusting it
Or click here for more information about hanging doors
Use the comments below if you have any tips of your own for installing flush bolts to rebated doors