How to Install Bathroom Vanity Units with ease
My Guide to Fitting Bathroom Cabinets and Counters

Before I install bathroom vanity units the first thing I want to determine is the finished height. This is almost always governed by the unit height + plinth + the floor covering thickness. I start by putting a long spirit level on the floor to work out the lowest point of the room just in case the floor is out of level, and I start my setting out from there. If you start at the highest point, the units are level, the plinth won't be tall enough where the floor runs down out of level.
You don't want to install bathroom vanity units too high, if unsure it's always better to be a little too low and have to trim the height of the plinth down a little for a tight fit than to have a gap that you can do very little with. This way, you can scribe the plinth down tight to the floor for a tight fit as well.
Once the thickness of the floor is determined (this could be as much as ply + under-tile heating + adhesive + tiles) and I've measured the height of the plinth I can add that to the height of the units. This measurement is the overall height to install vanity units, and will be the bottom of the counter. Find the lowest area of the floor and measure up the wall that amount, then use a spirit level to mark a straight level line around the walls.
How to install bathroom vanity units: step by step
- Setting up & preparing the vanity units
The bathroom units I installed in this example came with plastic legs that are height adjustable similar to those found in modern kitchens. These are great because they make it easy to adjust the height to allow for the correct plinth size and floor covering you are working with.
Unwrap the base units and screw the legs onto the bottom. I adjust all these to the height of the plinth before screwing them to the bottom of the cabinets. As you can see in the picture below, the front of the unit is on the left and the feet have a flat part which should face the front for the plinth to butt up against. Also, the flange should overlap the outer edge of the carcass otherwise all the weight is being loaded down onto the bottom shelf of the unit. With the overlap, the foot is also supporting the side panel of the carcass as opposed to just the bottom shelf. Sometimes I install bathroom vanity units with granite or marble counter tops so it's important to have that extra bit of strength because of the added weight on top.
Adjustable legs screwed to underside

Fixing vanity units to the wall
When I install bathroom vanity units they rarely fit perfectly in to a space and an infill will need to be used. Mark all the unit positions on the wall and put the last one in place. Now an off-cut of plinth or an end panel if they've supplied one can be marked to fill the space. Fix it through the back with a batten, if it's wider than the one in the pictures below a batten up the wall is needed too.
Sturdy batten used to fix infill panel


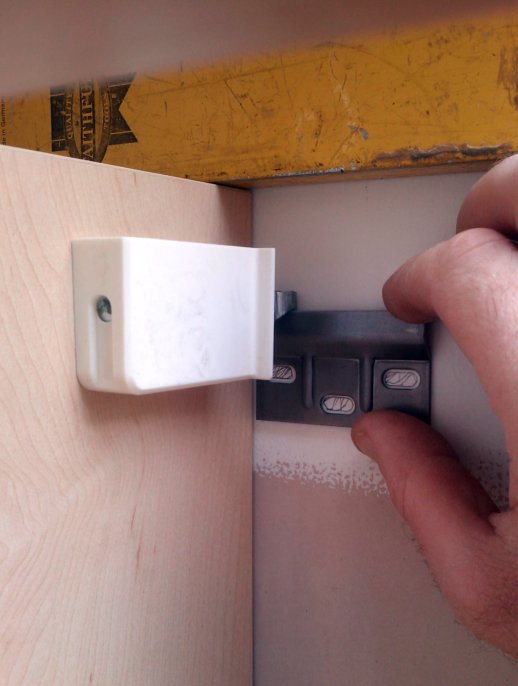
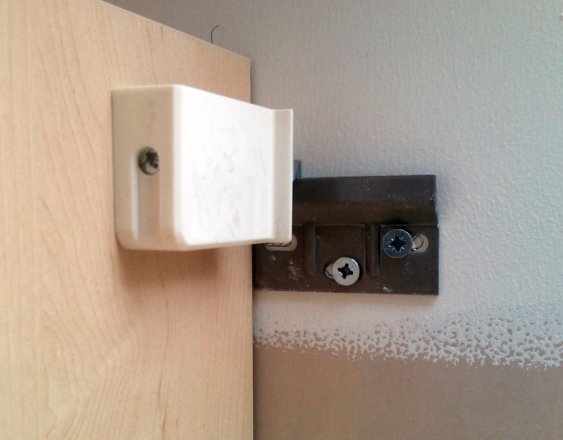
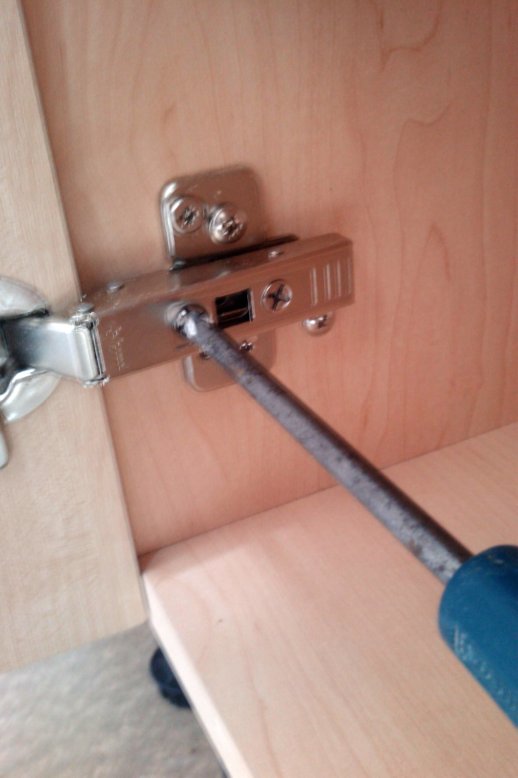
Like kitchens, bathroom units have french cleat style brackets that screw to the wall and clamps inside the unit that hook over them. These clamps have screws in them to finely adjust the unit for height. Simply hold each unit in position and mark where the brackets need to be on the wall then remove the units and screw the brackets back. If the wall is masonry use plugs and screws, or click here for suitable plasterboard fixings.
Marking and fixing brackets in position
Fix the units to each other
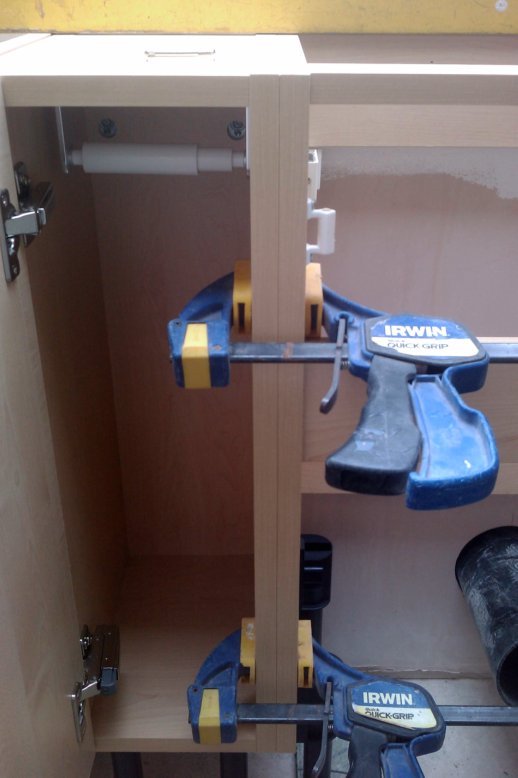
The units also need to be fixed to each other. I always clamp the units together to stop them moving when drilling a hole through them for the bolts. Ideally these want to be in a discreet/least visible position. Sometimes you can fit them behind hinges or where a shelf will later hide them from view, otherwise go for the top corner out of site.
Hold or clamp a scrap piece of timber on the other side when drilling to prevent annihilating it when the drill bit breaks through.
Clamp, drill and bolt units together
Once leveled across the back and from front to back I always use a framing square to check that the front of the units are square too. If not, it'll be impossible to get the doors to all line up nicely later on.
Hanging cabinet doors
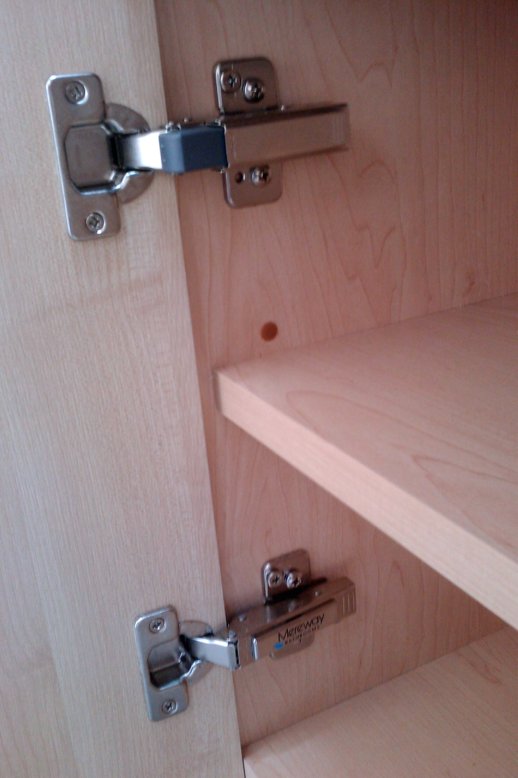
Hanging the doors is fairly straight forward, as long as you install bathroom vanity units perfectly square. Most off the shelf cabinets use concealed hinges. These are adjustable and can open to 110°. Part of the hinge screws to the door the other to the unit and the holes to screw into are either pre-drilled or marked with a pinhole.
Once each part is screwed on, the door can be offered up to the cabinet and the hinges simply click in.Once on, the doors can be adjusted up and down, left and right + forward/backward a little. When they all line up perfectly click the soft closers onto the hinges if supplied.
Clip doors on and adjust
Fitting cabinet handles
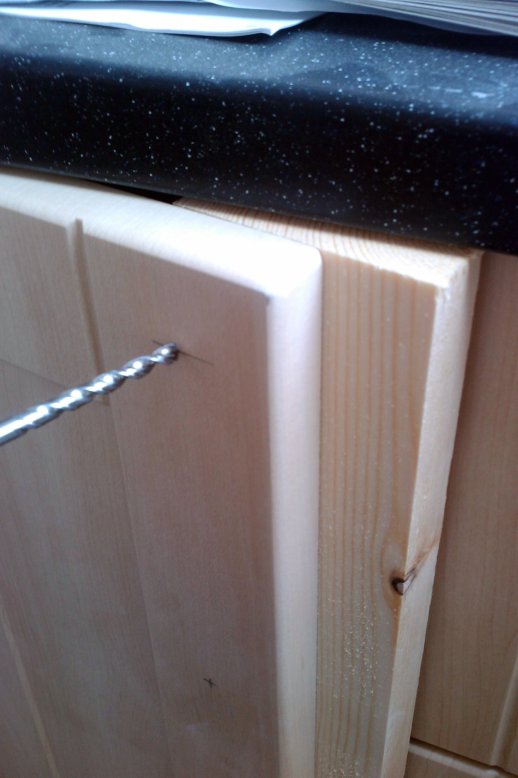
Quite often the position of the handles are marked with a pin prick inside the cabinet door, but handles come in different sizes! I always double check the positions line up with the handles and make sure the client is happy with where they are before I start drilling any holes. As in the picture below, I always hold a scrap piece of timber on the back of the door I'm drilling to prevent damaging the surface when the drill bit comes out.
Mark and drill door handle holes
Fitting the counter tops
When I install bathroom vanity unit counter tops I try and get the ones that have pre-finished ends, like these were. So all I had to do was cut the left side (that butts the wall) off when cutting to length.
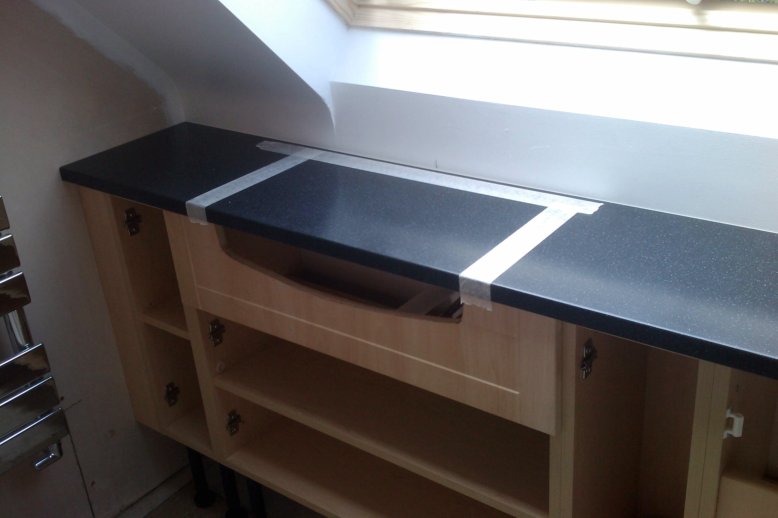
To mark the sink cut-out I put masking tape on the worktop so I can see them my markings when cutting. Because there's a slight overhang at the front, I had to allow for this and add it onto what I was cutting out of the back so the sink would slide right up to the cabinet fascia.
Use tape and template to mark sink position
Once the positions are marked and I've held the sink in place to double check, I put the counter on scrap timbers and cut the shape out with a plunge saw. You can use a normal circular saw (but cut from underneath) instead or a jigsaw, with a really sharp blade. Also, fix a batten along the wall to support the back of the counter once the chunk has been cut out.
Cut sink hole out of counter

How to install the plinths
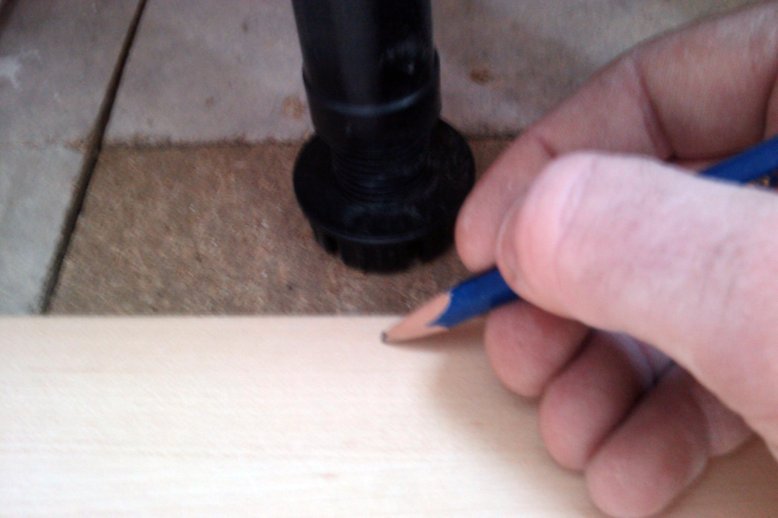
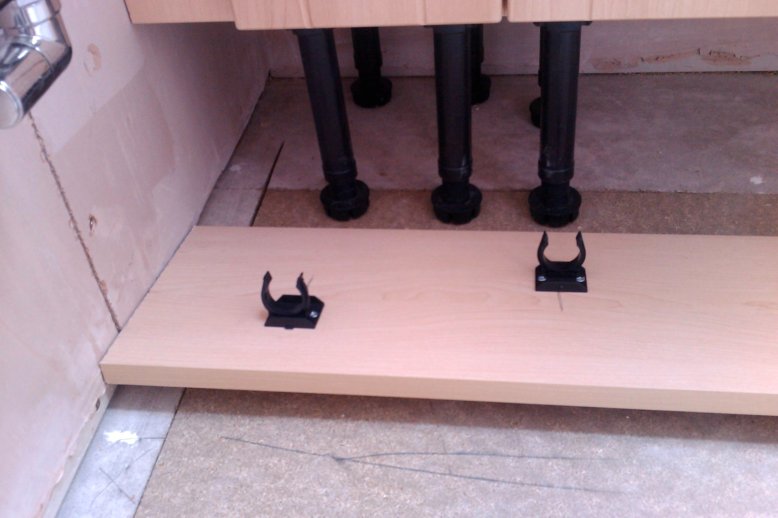
Fitting the plinths is one of the easier jobs. Cut them to length, and place them face down up against the legs. Transfer the center of the legs onto the back of the plinth and screw them on. I always stagger them slightly (high to low) to prevent the plinths rocking if they get kicked. (make sure screws are short enough not to go through).
Mark legs on plinths and fix brackets
If the plinths need to return round the side of the unit, use a piece of plinth to mark on the floor the outside edges of where each will be. Cut the front one first, keeping the finished edge of the plinth on the outer most part and finally cut the return one up to the back of the front plinth.
What's next?
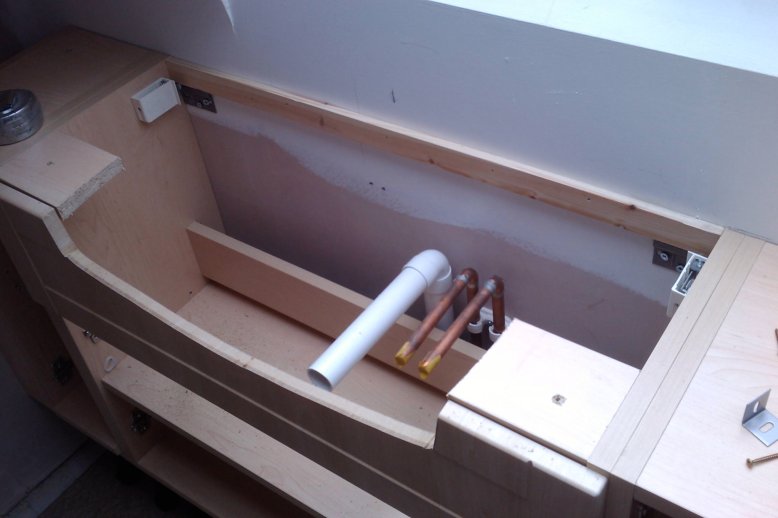
Once the units are in you're ready to boxing in any remaining pipework and even make a solid, accessible bath panel

Have a comment or question about installing bathroom vanity units?