How to build slatted shelves & racks for drying clothes and laundry in an airing cupboard
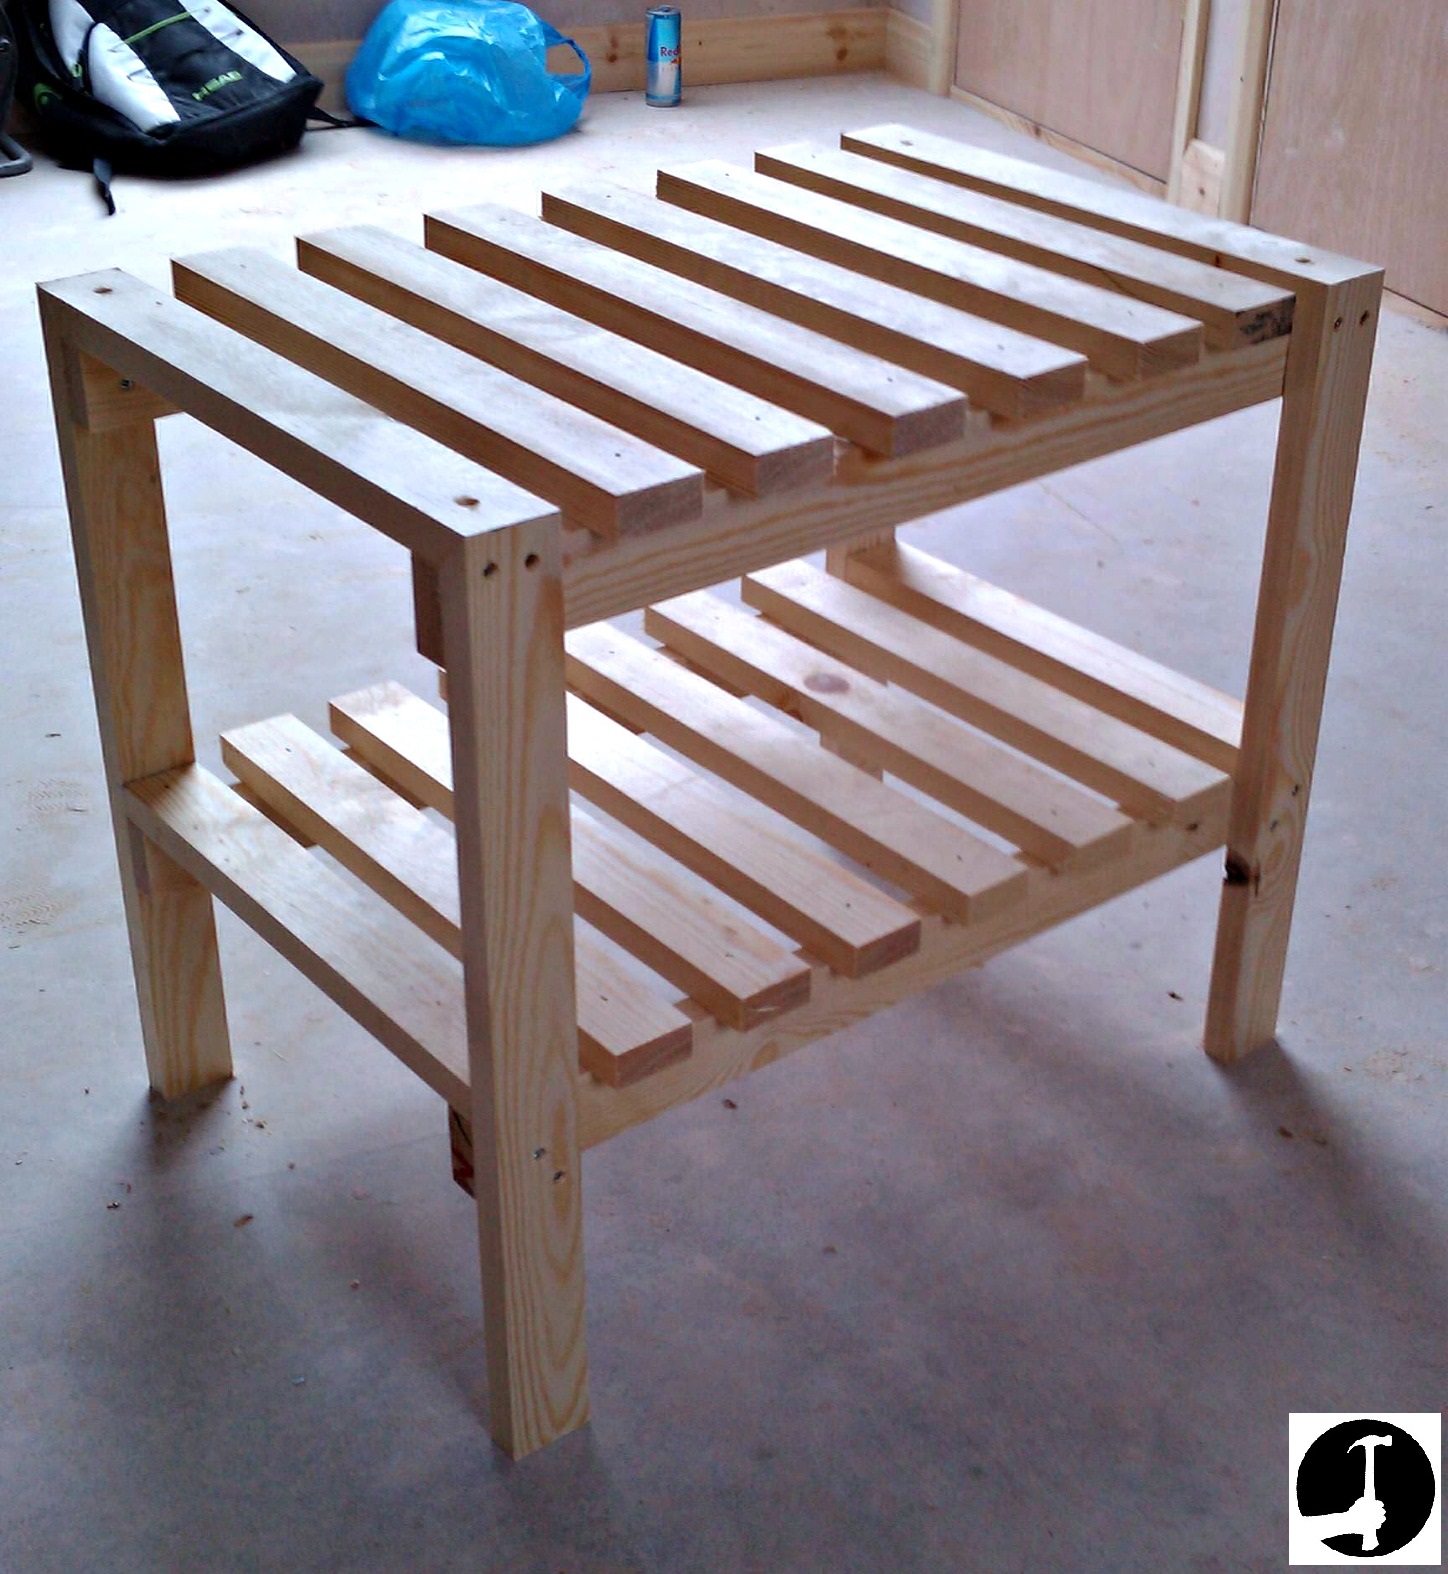
In an airing cupboard and sometimes in closets slatted shelves are another job during the finishing stages for a carpenter. Used for airing and drying out clothes that have been washed and for storing all your towels and bed linen etc.
What can often make them interesting to make is the complicated maze of pipework the all too considerate plumbers leave for you to get your head around!!
This is an easy DIY storage job too, and all you need to make them is some 2x1 planed timber battens (choose the straightest lengths you can find) and some basic tools and fixings. To finish them off nicely and increase their longevity (by ensuring they don't warp in the humid airing cupboard) a couple of coats of Danish Oil should do the trick.
They are relatively simple to build, and only get complicated when you need to start working around the pipework. I haven't come across a single plumber yet that has given any thought to the fact that the carpenter will be trying to shelve the cupboard at a later date so don't be surprised if the pipes are exactly where you don't want them!
How to make a slatted shelf: step by step
The first thing to do is work out how many shelves you want and at what heights. You can divide the height equally, or leave a larger space at the bottom for a drying rack or hanging rail to fit in before the shelves start above it. Sometimes you are governed by things like a stop cock that needs to be accessible, as to where you can put them. Make sure anything like that will still be easy to reach after the shelves are in.
 |
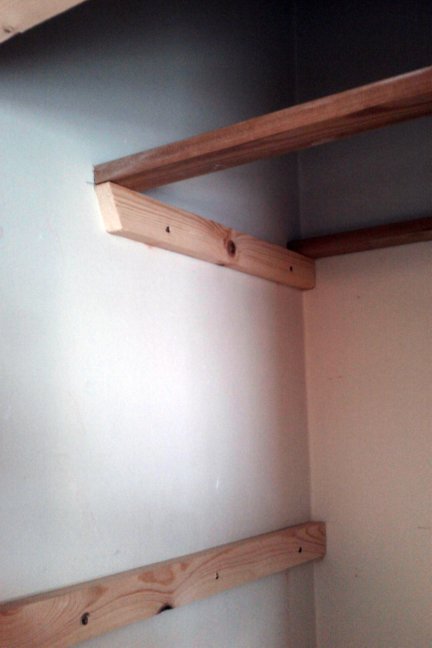 |
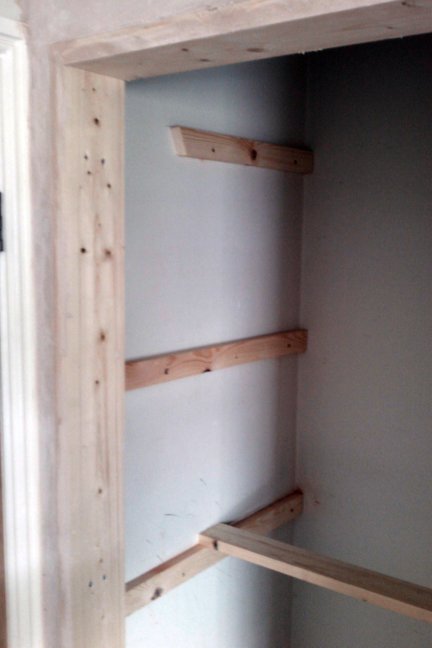
As you can see in the picture above, the first two are the full det hof the cupboard and left I have fixed three battens to the wall, the top shelf will be shorter so it's still easy to access. I've also used a bit of 75x25mm (3x1) timber for the middle of the bottom shelf that is 1000mm off the floor, I'm going to screw a hanging rail underneath for hanging and drying shirts or trousers etc.
When fixing battens to walls it never hurts to use a bit of Gripfill if you've got some on the back to make sure they don't ever budge. If I'm fixing to masonry I'll use red Rawl-plugs and 50/60mm screws. If it's a stud-work wall there's tips here about fixing to plasterboard and a list of suitable fixings.
Then cut two slats, one for the front and one for the back of each shelf. I pin mine to the wall battens with a finish nail-gun, and I haven't hit a pipe...yet!
Fitting slatted shelves around pipes
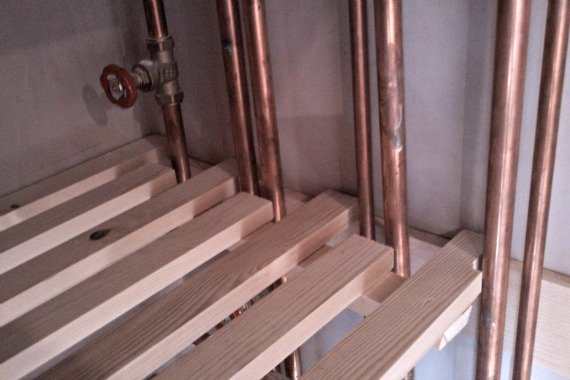
For the other side, I had to do the wall battens in two bits to get past the pipework. Watch out for pipes and cables, there shouldn't be any sockets in an airing cupboard though.
 |
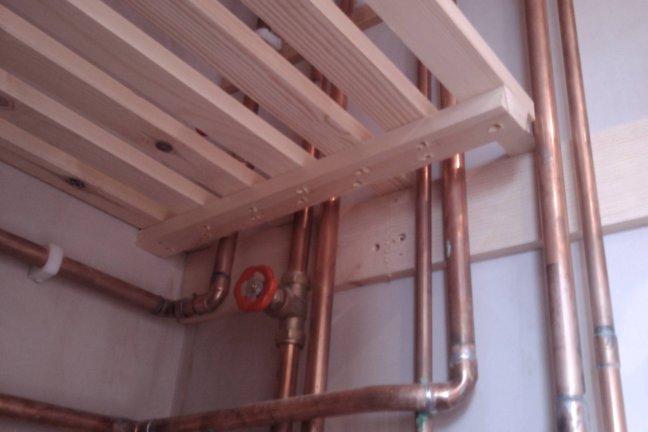 |
Cut another batten that will reach from the front to the back slat to support the shelves that can't reach the wall because the pipes are in the way. Drill, countersink, glue and screw it up from underneath where the screws won't be seen, like in the picture.
Now it's just a matter of filling the shelves up. I cut the slats in where they will reach from wall to wall but cut the others a little shorter than touching the pipework.
To space them out I normally use an off cut of batten on edge (about 18mm or 3/4in) starting from the front and working backwards. As you get closer to the back wall space the last few out evenly over the gap that's left. Once you've done one you simply repeat the process for the rest. If you wanted identical gaps all over you could use the same method as when spacing stair spindles evenly.
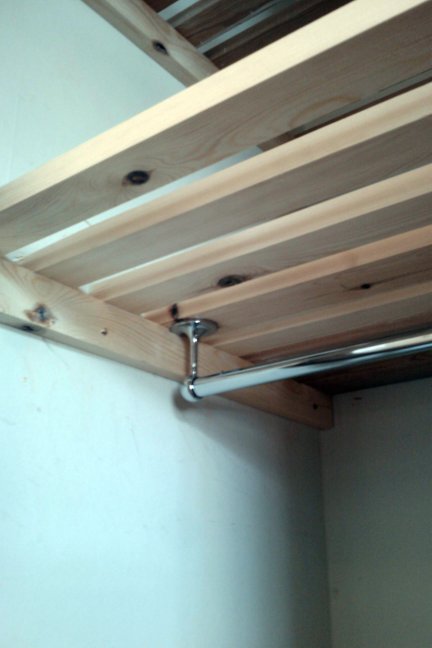
Here's the hanging rail fixed underneath to the slightly wider slat of the slatted shelves for drying shirts trousers etc.
Fix a hanging rail underneath for drying shirtsBecause I've done loads of these shelves now for speed I generally cut and fix all my wall battens, cut 2 battens for the front and back of each and fix them all, a supporting batten for front to back of each shelf and add all the infills last. I make a list of each piece I can cut before returning to the saw to keep the journeys to a minimum. It just helps save time doing each step for all the slatted shelves instead of doing one before moving on to the next step etc. Finally, to finish them off give them a light sand before applying two coats of that Danish Oil |
 |
What if you can't fix a batten to the other wall!?
 |
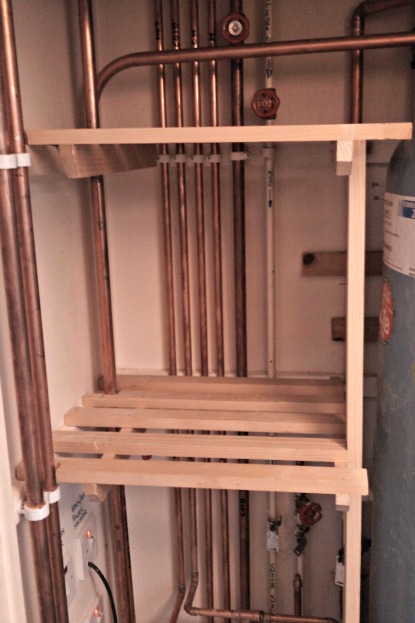 |
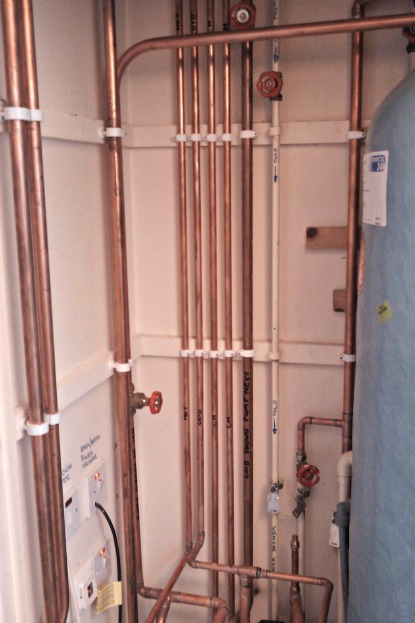
Since building this page I've come across a cupboard that had a huge hot water tank on one side, so it was only possible to put a batten on one wall. To hold the other side up, I simply used another batten as a post, and fixed a batten from that to the one on the back wall. 50 x 50mm square might have been better for the post but this felt strong enough as they are only small slatted shelves and was all I had on site.
Have a question or comment about slatted shelves?