What are window cills and window boards and why do you need them?
How to cut, rebate, router, fix or replace timber window boards & sills
What is the difference between a window board and a window cill (or sill?)
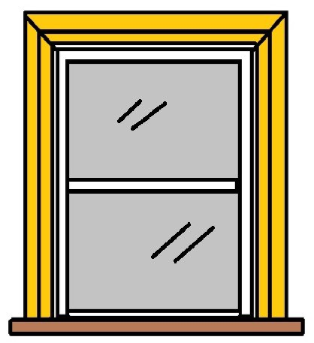
The big difference between window cills & window boards (pictured below) are one is on the outside of the building, the other is fitted on the inside of the house. They are similar but both perform very different roles and are often confused with each other.
To confuse things even more, sometimes window boards on the inside are referred to as window sills or window ledges! Got to love the English language..
Is the correct spelling window Cills or Sills?
From what I can gather, both spellings are used and window 'sill' may be more commonly used these days.
For some reason I have always known them to start with a 'C'!

Why do you need window cills and why do you need a window board - what do they do?
What does a window cill do?
When windows are installed, they are set back slightly from the outer face of the brickwork.
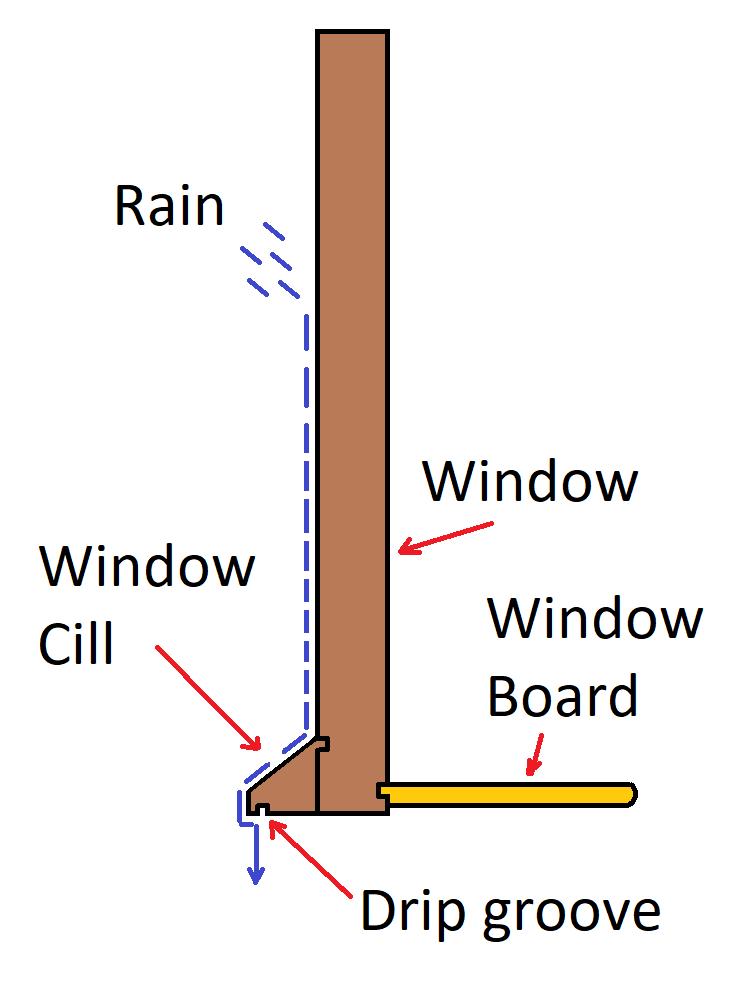
The window cill is fitted to the bottom so that when rain water hits the outside of the window, it runs down onto the cill and then drips off, diverted away from the building.
In the above picture, the groove in the underside of the window cills shape is really important - there so the water will actually drip off. Water will run to the lowest point before dripping, so without this groove it could keep travelling towards the bottom of the window or the building and build up/penetrate causing damp problems.
In addition, the window cills can help stabilise the bottom of the window and therefore add some strength and help keep it secured in place.
What does a window board on the inside do?
Slightly different on the inside, the main purpose of the window board is to structurally complete the window aperture by bridging the cavity gap between the window and the front internal wall. That is why in the picture above it is much longer than the external window cill.
An additional function of the window board is for it to divert condensation away from the window that has dripped down, but in an ideal and well ventilated room there shouldn't be a huge amount of condensation.
Finally window boards also form a nice ledge or shelf that ornaments or plants can be sat on.
How do you fit window cills on the outside?
The most important part is to get the windows fitted right, check-out this good practice installation guide for more information.
Window cills are normally supplied with the window itself but the size you need will depend on the depth of brickwork, how far back the window needs to be fitted and whether or not the brickwork will be rendered or is already face brickwork.
They are really easy to screw on. There is usually a tongue that fits into a groove along the bottom of the window. You may need to plane a very slight leading edge onto the tongue to get it to slide into rebated groove in the bottom of the window.
The window cill should always be fitted so the drip underneath overhangs the front and sides of the brickwork.
When cutting to length, I add enough to pass the brickwork each side by around 30-50mm (more if the walls are to be rendered).
The depth you will need to 'notch' will depend on how far back the face of the window needs to be from the front of the brickwork and also whether the wall will be rendered.
Always put lots of exterior/water resistant PVA glue on before screwing the cill to the window.
Making a window board to size
You can buy window boards straight off the shelf made from pine, hardwood or MDF (ideally moisture resistant). They'll come with a tongue already cut into the back like the picture below to slot into a groove in the bottom of the window. They will also come with the nosing or rounded over edge already machined down one length as well.
If you're making your own boards which is sometimes better if you want the timber to match because the window and board are both being stained, or you need a deeper than usual board then you'll need a router with a round-over bit to shape the nosing and a straight router cutter for the rebate.
It is possible to make the rebate with a circular saw if you don't have a straight cutter.
The measurements for your window boards will depend on whether the wall is being plastered, plaster-boarded or covered with something else. I always aim to finish up with around 50mm extra width on each side, and a 25mm projection at the front.
- Step 1: Work out the right window board width
Measure the width of the opening/window, add 100mm for the overhang (50mm each side), add the thickness of plaster/plasterboard that's going on the walls and cut the window board to that width.

Those projections look fine and are in proportion, unless you are replacing an existing sill in which case you should match to the rest of the house.
The only other time I change that is when I'm working on Victorian box sash window boards where the architrave is mitered round the window and sits down onto the window cill.

In this instance I add extra depending on the size of the architrave being used. There's more info about fitting architrave moldings to Victorian sash window cills on the bottom of the architrave page.

Step 2: Machining the bullnose edging onto the window cills
Use a router with a rounding over cutter bit and guide to machine a Bullnose edge onto the board.
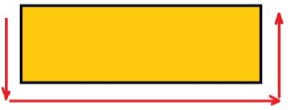
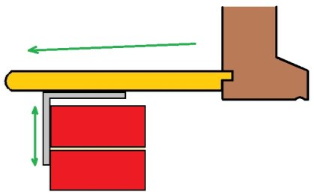
Some people prefer to push the router away from themselves I prefer to walk backwards pulling the router towards me, obviously making sure the coast is clear first! The pic below shows the direction I use the router in while standing at the bottom. Once one side is done, flip it over and machine the bottom of the window cill too before finishing off with sandpaper.

Once the edge is rounded over you can cut the notches out of the back corners and rip the back off to the correct depth (Depth of groove in window + board + overhang).
- Step 3: Rebate the back to slot into the groove in the bottom of the window
You can use a straight cutter in your router to cut the rebate or set the circular saw to the desired depth and then use the fence to set the width of the tongue. I always make it 1-2mm shorter than the depth of the groove and put loads of wood glue on the back before sliding the tongue into the rebate on the window.
How do you fix window boards securely to the wall and window?
There are several different methods you can use to fix window boards in place. You can simply glue them down with Gripfill or expanding foam and weigh them down with something till the glue goes off.
I try to avoid visible fixings on finished work unless its being painted but sometimes it's necessary to drill pilot and countersink holes in the top of the board before screwing down into the masonry or stud work.
When I'm fixing window boards to masonry that hasn't been plastered yet I slot the tenon into the window rebate and mark the edge of the brickwork along the underside of the window board. Remove it, turn it over and screw a couple of Lateral restraint straps (really cheap) or L - brackets to the bottom of the board no more than 300mm apart.
Using lateral restraint straps to fix window boards means you can adjust the front edge of the board up and down before screwing the strap to the brickwork. These are then plastered over and hidden

Sometimes I put a very slight fall on the window cill so if there's any condensation it will run toward the front of the board not towards the bottom of the window (top green arrow above) where it will sit, eventually rotting the timber or causing mould.
Before the plasterer gets in to plaster the wall, squirt some expanding foam into the gap to really secure the window board too and prevent it coming loose over time.
If working in a stud-work wall, once the window boards are installed the plasterboard can be cut and fitted.
Use the comments box below to provide your own tips and tricks when it comes to fitting window cills
