Fitting Alcove Shelves in an alcove or recess
Alcove shelves are probably the quickest and easiest shelf to make. There are also lots of finishing options so you can personalise them to suit your decor.
And they can be made out of several different types of materials like MDF, Oak and Pine for example.

The easiest way to build this type of shelf is to fix three battens, one on each wall for the shelf to sit on. I always fit the back batten to the wall first, using a spirit level to make sure it is level. If the alcove is too narrow for your level, measure up from the floor or down from the ceiling instead. Just be aware that if the floor or ceiling are out of level the shelves will be too! It may be better to measure from both and split the difference if you get two different measurements.
I generally like to keep the shelf's edge back from the front wall edge by about 20mm as in the picture above.
This is the same method I use for making floating shelves in an alcove.
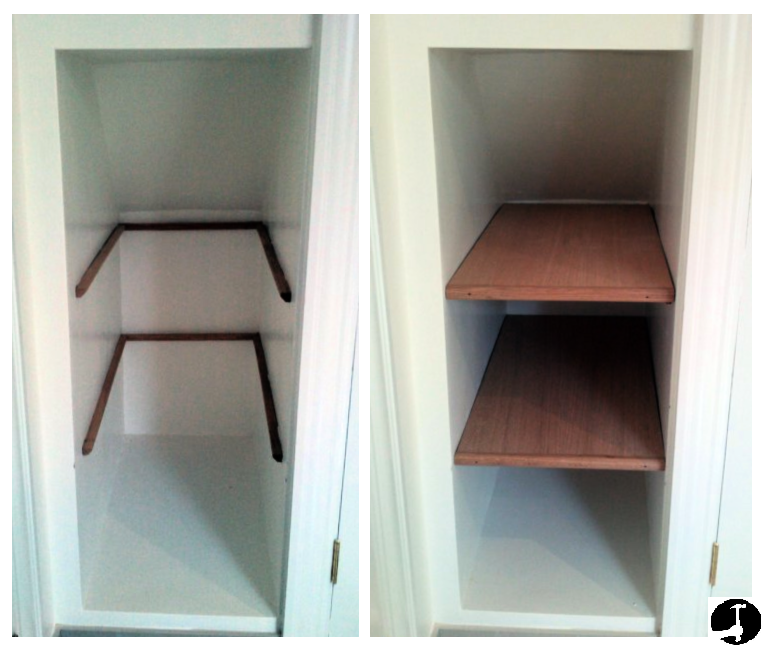
The pictures below are of some oak veneered MDF shelves I built for a customer in an alcove. I fixed oak quadrant round the walls keeping the side ones a bit shorter than the depth the shelves would be so that they were less visible. Once installed, I pinned an oak D shaped molding across the front edge to cover the cut MDF and finish them off, ready to varnish or stain.
Alcove Shelves: step by step instructions:
This is the order I would attack alcove shelves like this in;
- Fix a batten to the back wall first
Cut and fix a batten to the back wall at the height you want the shelf. For this you can use doorstop, architrave or almost any type of timber you want.
When measuring, you can afford to take 5mm off the measurement as a 2.5mm gap either side will mean it goes in easily and the gap will be covered by the returns/side battens.
Before you fix to the wall, make sure there are no sockets/cables under/above where you are drilling and use a stud/cable locator if you are unsure.
Use red Rawl plugs and 8g screws if fixing to masonry or plasterboard fixings for cavity walls.
For lightweight shelves I use heaps of Gripfill on the back of the battens and then pin with my Nailgun to hold in place until the glue goes off.
- Cut and fix the side battens
Using the same material as before cut two battens for the sides. I keep these back from the front edge of the shelf and cut a slight angle on the front edge too, like in the picture at the top of the page. Alternatively, cut them to the same measurement you want the shelf (remembering to allow for the thickness of the back wall batten), keep them square and finish later with a piece fixed across the front edge of the shelf.

- Cut the shelf
Cut the alcove shelf. I make most shelves of this type out of MDF which is easy to paint. Alcoves are often out of square so I take a measurement at each of the four sides. I also use a large roofing square to check which of the back corners are 90° and always start my setting out from a perfectly square corner. If each corner is out of square, use a bevel to find the angle of one corner and start setting out on the sheet material from there. When a shelf needs to be badly out of square I always leave the lines in slightly when I cut it, that way I can put it in place and scribe it in, using an electric plane to finely fit it into the opening.
- Decorate the front edge?
he simplest way to finish the front edge of your shelves is to simply leave it square. If doing this, cut the side battens about 20mm short from the front edge and back at a slight angle too. This will soften their appearance slightly.
The front edge of the shelf doesn't need to be left square, you can jazz it up a bit. If you have a router you can use it with a round over cutter or an s shaped cutter to put a fancy edge on it.
Alternatively buy a decorative bead or wider square profile timber to glue and pin across the front edge. I normally use a decorative bead which is slightly thicker than the MDF I use, then simply keep the top edge flush with the top of the shelf and let the bottom hang down past. I fix it with plenty of wood glue and use veneer or panel pins. Apart from looking a lot more professional it also has the added benefit of strengthening the front edge of the shelf preventing it from bowing down once loaded with books etc.
- Fix alcove shelves in place?
It is not always necessary to fix the alcove shelves in place as the weight of what is going on there will often be enough to stop it moving anywhere. Decorators often want to take it out to paint it as well. If you do want to fix it, either drill pilot holes, countersink and screw about 100mm (4") in from the back corners or pin using a finish nail-gun.
I would generally avoid hammering nails in to the shelf as you will most likely move the battens from their original position. If you do need to pin with a hammer and nail, perhaps drill a tiny pilot hole first, to reduce the force needed to nail them in place.
Another method you could use for Alcove Shelves with less visible bearers or brackets is a ladder type method like I used for these floating alcove shelves
Click here to go back to the main shelving page

Have a question or comment about alcove shelves?